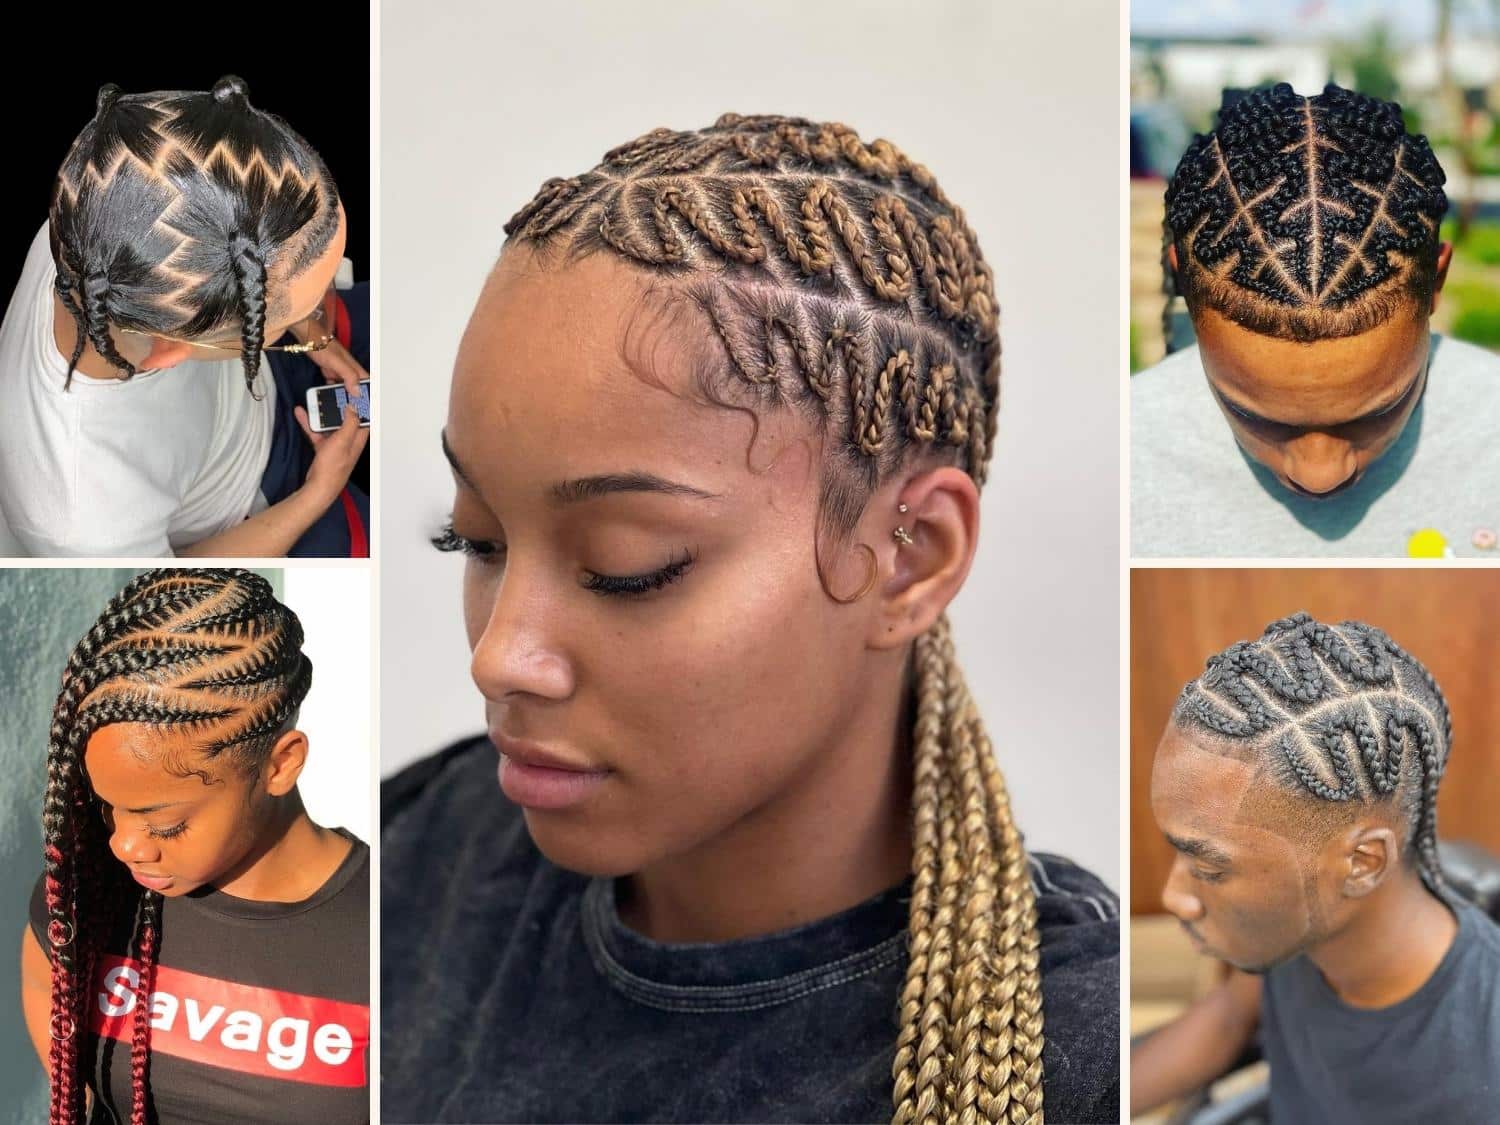
You've probably seen them on your feed. Those crisp, razor-sharp lines that look almost too perfect to be real. Zig zag stitch braids are everywhere right now, and honestly, it’s not hard to see why. They take the classic feed-in technique and turn it into literal art. If you're tired of the same old straight-back cornrows, this is basically the upgrade you didn't know you needed.
But here is the thing.
Getting them right is a whole different beast compared to regular braids. It’s not just about "zig-zagging" the part; it’s about the tension, the product, and that specific "stitch" technique that creates those tiny horizontal lines along the scalp. Most people think it’s just a trend, but if you talk to any master braider, they’ll tell you it’s a technical skill that separates the pros from the amateurs.
The Reality of the Stitch
So, what makes a stitch braid a stitch braid? It’s all in the pinky finger. Or a precise parting comb. To get that ribbed effect, the stylist has to section off tiny horizontal slivers of hair before adding them into the main braid. When you do this with a zig zag part, the complexity doubles. You aren't just working in a straight line anymore. You’re navigating corners.
A lot of stylists use the "pinky method," popularized by braiders like Stasha Harris (the mind behind many viral Cosmopolitan "The Braid Up" videos). This involves using your natural nail or a precise tool to carve out those ridges. When you combine this with a zig-zag parting—which requires a steady hand and a high-quality rat-tail comb—you get a look that is incredibly structural. It’s architectural. It’s also kinda exhausting for the person in the chair, but the results usually speak for themselves.
Why People Get This Style Wrong
I’ve seen a lot of "failed" zig zag stitch braids. Usually, the issue is one of three things: messy parts, inconsistent tension, or way too much product.
Let's talk about the parts first. A zig zag isn't just a scribble. To look good, the angles need to be consistent. If one "zig" is two inches long and the next "zag" is half an inch, the whole head looks lopsided. Professional braiders often use a "mapping" technique where they lightly trace the pattern on the scalp with a white eyeliner pencil or the tip of a comb before they even touch the jam.
Tension is the other big one. Because you’re pulling hair from different angles to meet that jagged part, it’s easy to pull too hard. Traction alopecia is a real risk here. If you see those tiny white bumps at the root, your braids are too tight. Period. Honestly, no hairstyle is worth losing your edges over.
The Product Game
You cannot—and I mean cannot—achieve clean zig zag stitch braids with just water and grease. You need a heavy-duty edge control or a braiding gel with serious hold. Products like Let’s Jam or Shine ‘n Jam (Extra Hold) are the industry standards for a reason. They provide that "tacky" grip that keeps the hair molded to the scalp so the stitches stay visible.
But don't overdo it.
If you use too much gel, your hair is going to be a flaky mess by day four. The trick is applying the product specifically to the partings and the "teeth" of the stitch. You want the hair to look sleek, not submerged. Also, if you have fine hair, you might want to avoid the heaviest gels and opt for something with a bit more protein to help the hair withstand the manipulation.
How to Prepare Your Hair
Before you even think about sitting in that chair for four hours, you have to prep. This isn't the time for a "wash and go." Your hair needs to be blown out straight.
- Cleanse: Use a clarifying shampoo to get rid of any old buildup. You want a blank canvas.
- Deep Condition: Those stitches put stress on the strands. Give them some moisture beforehand.
- The Blowout: Use a heat protectant. Stretch the hair as much as possible. The straighter the hair, the cleaner the stitch.
- Detangle: If there’s a single knot, the parting comb will snag, and your zig zag will look like a heartbeat monitor during a jump scare.
Longevity and Maintenance
People always ask: "How long do zig zag stitch braids last?"
The honest answer? Not as long as regular box braids. Because the parting is so intricate and the "stitches" rely on hair being perfectly molded, any new growth or frizz will show up much faster. Usually, you’re looking at 2 to 4 weeks.
To keep them looking fresh, you need a silk or satin scarf. Not a bonnet—a scarf. You need that compression to keep the braids flat against your head. If you move around a lot in your sleep, those zig zags will start to fuzz up within days if they aren't tied down tight.
Also, skip the heavy oils on your scalp for the first week. You don't want to break down the gel that's holding the shape. If your scalp gets itchy, use a cotton swab with some witch hazel or a specialized scalp ginger spray to spot-treat the area without ruining the work.
Breaking Down the Cost
Let’s be real: this style is expensive.
You aren't just paying for the hair extensions; you’re paying for the labor and the literal artistry. A standard set of feed-in braids might run you $100 to $150. For zig zag stitch braids, expect to pay anywhere from **$200 to $400**, depending on the length and the size of the braids.
Smaller braids = more stitches = more time = more money.
Some stylists also charge a "premium parting" fee. It sounds like a cash grab, but when you realize they are spending an extra hour just perfecting the geometry of your scalp, it starts to make sense.
The Versatility Factor
One of the coolest things about this style is how it adapts. You can do zig zag stitch braids into a low ponytail, a high bun, or even combined with a sew-in or a "half-up, half-down" look.
I’ve seen some incredible variations where the zig zags are only on the sides, feeding into a massive fro-hawk. Or, for a more subtle vibe, you can do just two "goddess" style braids with the zig zag part. It’s a great way to test the waters if you aren't ready to commit to a full head of 15+ braids.
Is It Right For Your Hair Type?
While this style works on most hair textures, it definitely favors Type 4 hair. The natural kink and coil of 4A-4C hair provide the structural integrity needed to hold the "stitch" in place.
If you have Type 3 hair or lower, the "stitches" might tend to slip or unravel faster. In those cases, the braider might need to use a bit more "filler" hair (like Kanekalon) right at the root to create an anchor. It’s totally doable, just something to keep in mind when you’re looking at inspo photos—try to find someone with a similar hair density to yours.
Making It Happen: Actionable Steps
If you’re ready to pull the trigger on this look, don’t just book the first person you find on Instagram.
- Audit their portfolio: Zoom in on their photos. Are the parts crisp? Are the "stitches" uniform in size? If the photos are blurry or filtered to death, run.
- Consult on length: If you want floor-length braids, tell them upfront. This style requires a specific way of adding hair to keep the "stitch" visible all the way down.
- Check the product list: Ask what gel they use. If you have sensitive skin or a known allergy to certain preservatives (like methylisothiazolinone, often found in hair gels), you need to bring your own product.
- Time it right: Don't get these the day before a beach vacation. Saltwater and chlorine are the natural enemies of the stitch braid. Get them for an event where you can stay relatively dry and cool.
At the end of the day, zig zag stitch braids are a major confidence booster. There is something about having perfectly symmetrical, intricate patterns on your head that just makes you feel put together. Just remember that the "wow" factor comes from the precision. Take the time to find a specialist, prep your hair properly, and invest in a good silk scarf. Your scalp will thank you, and your photos will look incredible.
Maintain the look by using a light foam mousse (like Nairobi or Lottabody) every few days to lay down flyaways. Apply the mousse, tie your scarf on for 15 minutes, and you’re basically back to Day 1 freshness. Avoid over-washing; if your scalp feels gross, use a dry shampoo or a damp cloth. Protect the investment. High-maintenance hair requires high-maintenance care, but for the aesthetic of a perfect zig zag, it’s usually worth the effort.